In this Pillars of Eternity 2: Deadfire Build Guide we are going to be taking a look at Holy Slayer, which is a multiclass between Paladin and Rogue. The focus here is on the newly added Paladin subclass Steel Garrote. I’ll be providing information on Attributes, Weapons, Armor, and most importantly, what Abilities to take and how to use them. Please note that this Build Guide was updated for the 5.0 version of the game, as well as 1.01 on console (as of January 22th, 2020), and works for Real Time with Pause, but not Turn-Based.
Holy Slayer Multiclass Build Guide
This multiclass build uses the Streetfighter Rogue and Steel Garrote Paladin to sustain itself while fighting multiple enemies at once, dealing massive single target damage and healing through the Steel Garrote’s subclass passive, which heals you for a portion of damage dealt vs. Afflicted enemies.

Streetfighters specialize in fighting multiple enemies at once due to decreased Recovery Time of 50%, and increased Sneak Attack damage by 50%, when Flanked or Bloodied and increased Weapon Crit damage by 100% when both Flanked and Bloodied. Steel Garotte grants the Garrote ability that Paralyzes one enemy, deals Raw damage while Paralysis is active, and after the effect ends the target becomes Prone. It is a useful ability to remove one enemy from the fight for short period of time while doing some damage. The passive that we are going to benefit the most from is 15% Weapon Damage against afflicted enemies returned as healing. It is not an insane heal by any means but with this build it is going to sustain us while we deal with the enemies.
Subclass abilities recap:
Streetfighter
- Reduced Recovery by 50% and increased Sneak Attack damage by 50% when Bloodied or Flanked
- Increased Weapon Crit Damage by 100% when both Bloodied and Flanked
- Increased Recovery by 20% when neither Flank nor Bloodied
Steel Garrote
- 15% of Weapon Damage returned as heal
- Grants Garrote ability
Attributes and Race
Every attribute is useful for this build, but we need to make cuts somewhere unfortunately. That is why focusing on MIG, DEX and PER are the priority. MIG affects the damage we do, which is really important since we get 15% back as healing. More damage means more healing. DEX is used to strike enemies more often which leads to higher DPS and more frequent heals. PER is the most important stat for any DPS class because it increase Accuracy. If we cannot hit an enemy then we cannot heal (or kill them). On higher difficulties it is harder to hit enemies due to increased Deflection. Leaving the rest at 10 is recommended because everything offers something to this build. INT affects the Duration and AoE size of Enduring Beacon and Garrote, RES increases Deflection, and CON health.

You can use any race but some work better for this particular build. These are the best choices:
- Human: +1 to MIG and RES. Increased Accuracy and damage when Bloodied or Near Death.
- Moon Godlike: +1 to DEX and INT. Initiate healing wave when at Health threshold (Hurt, Bloodied and Near Death)
Equipment
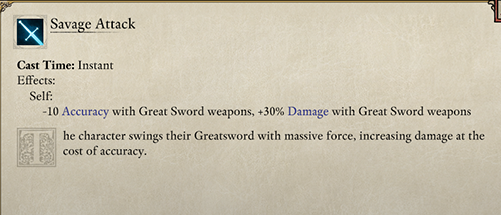
This build is not gear dependent, which gives you plenty of choice when it comes to what to equip. The Weapon we are using is either a Greatsword or Two Battle Axes. The Greatsword has a modal ability, Savage Attack, that increases damage by 30% but decreases accuracy by -10. Battle Axes have a passive that increases Crit damage by 20%. For the Greatsword I went with Sanguine Greatsword because it has an upgrade that restores 10 Health in 6 secs upon scoring Crit. Its not much but it adds up. Twin Eels is another fantastic choice but it requires the Beast of Winter DLC. It heals the wearer and allies upon killing an enemy and increases Hit to Crit ratio with Weapon attacks. Both of these bonuses scale with Religion. An example of a good Battle Axe would be Magran’s Favor with Eternal Devotion because it increases Fire Levels, does Burn damage as well, and has the Blazing Core upgrade which heals wielder for a bit when striking an enemy.

There are a couple of Armors that fit well with this build. First you need to decide which one you want to wear, medium or light. Medium offers more protection, while Light offers reduced Recovery Time. Some good choices for Medium Armor would be The Bloody Links (various bonuses when Bloodied), Contender’s Armor (more enemies engaged and reduced Recovery per Athletics skill), Devil of Caroc Breastplate (Health restored on Crit and decreased Recovery) and Casita Samelia’s Legacy (increased Deflection with Intimidate skill). As for Light Armor, Swift Hunter’s Garb and Miscreant Leather since both decrease Recovery and damage taken while Flanked or from Flanking Attacks.


From other items I would recommend Champion’s Cape (10% chance to do a Primary Attack Riposte when an enemy targets Deflection and misses), Maker’s Own Power (Reforge the Flesh ability that heals and reduces incoming damage by 85% but makes you paralyzed during the process), and for hands something like Woedica’s Strangling Grasp (+2 MIG and grants Garrote so you do not have to waste Zeal to use it), Aegor’s Swift Touch (+1 DEX, +5% Action Speed with Weapon) or Gatecrashers (+1 MIG, AoE Stun ability and chance to Knock Down enemy upon scoring Crit). Generally what you are looking for are items that boost PER, MIG or DEX for all slots.


Holy Slayer Abilities
From active abilities we only need 3. Debilitating Strike which increases damage done by 25%, adds 2 PEN and puts Distracted and Hobbled afflictions. Sometimes enemies can resist or remove Distracted from Persistent Distraction and Hobbled, which means you won’t benefit from Deathblows. That is where Debilitating Strike comes in play because it puts Distracted back, making the Deathblows bonus count again. Enduring Beacon is an excellent upgrade for this build since it puts Blinded on enemies around, making them miss more which triggers Riposte from Champion’s Cape and the Rogue Riposte passive. Every time you Riposte you also heal since it counts as Weapon Damage. The third ability is Eternal Devotion, naturally. Added Burn damage is nice to have, and it is a powerful ability that has increased Accuracy by 10 when used so scoring a Crit becomes easier.
Streetfighter Rogue
![]()
![]()
Crippling Strike – An amazing ability that increases damage dealt by +25% and adds 2 Bonus Penetration. In addition it is a Full Attack, meaning you are going to attack with both weapons at once (if you Dual Wield). This is the ability you will be using the most, as it only costs 1 AP and is available very early in the game.
![]()
![]() Two Weapon Style/Two-Handed Style– Decreases Recovery Time when wielding 2 Weapons or increased Damage when wielding 2 handed weapon. Which of these you need depends on if you went for one weapon in each hand or a two-hander.
Two Weapon Style/Two-Handed Style– Decreases Recovery Time when wielding 2 Weapons or increased Damage when wielding 2 handed weapon. Which of these you need depends on if you went for one weapon in each hand or a two-hander.
![]()
![]() Dirty Fighting – Converts 10% of Hits to Crits. Works with Melee Attacks and Abilities, making it a must for any damage dealing Class.
Dirty Fighting – Converts 10% of Hits to Crits. Works with Melee Attacks and Abilities, making it a must for any damage dealing Class.
![]()
![]() Riposte – Chance to make a Full Attack Counter when an attack targeting Deflection misses.
Riposte – Chance to make a Full Attack Counter when an attack targeting Deflection misses.
![]()
![]() Persistent Distraction – An amazing ability that puts Distracted and Flanked on an opponent when you engage them in combat, meaning that Sneak attack and Deathblows passives are automatically added to your attacks.
Persistent Distraction – An amazing ability that puts Distracted and Flanked on an opponent when you engage them in combat, meaning that Sneak attack and Deathblows passives are automatically added to your attacks.
![]()
![]() Deep Wounds – 20% of Damage dealt added as Raw Damage over time. A great ability for increasing your overall damage output.
Deep Wounds – 20% of Damage dealt added as Raw Damage over time. A great ability for increasing your overall damage output.
![]()
![]() Uncanny Luck – A useful passive that adds 5% chance to avoid any attack and adds 5% Hit to Crit conversion that stacks with 10% Hit to Crit conversion from Dirty Fighting.
Uncanny Luck – A useful passive that adds 5% chance to avoid any attack and adds 5% Hit to Crit conversion that stacks with 10% Hit to Crit conversion from Dirty Fighting.
![]()
![]() Slippery Mind – A great survival Ability that makes you immune to Perception, Intellect and Resolve Afflictions while Bloodied or Near Death.
Slippery Mind – A great survival Ability that makes you immune to Perception, Intellect and Resolve Afflictions while Bloodied or Near Death.
![]()
![]() Improved Critical – Increases Crit Damage by 10%, making it a must for any damage dealing Class.
Improved Critical – Increases Crit Damage by 10%, making it a must for any damage dealing Class.
![]()
![]() Deathblows – Increases Damage done by 50% with Abilities and Weapons against any opponent that suffers from 2 or more Afflictions that enable Sneak Attack. Deathblows works best with the Persistent Distraction passive because it automatically puts Distracted and Flanked on any enemy that you engage, and Distracted and Flanked are both conditions that enable Sneak Attack.
Deathblows – Increases Damage done by 50% with Abilities and Weapons against any opponent that suffers from 2 or more Afflictions that enable Sneak Attack. Deathblows works best with the Persistent Distraction passive because it automatically puts Distracted and Flanked on any enemy that you engage, and Distracted and Flanked are both conditions that enable Sneak Attack.
Steel Garrote Paladin
![]()
![]() Eternal Devotion – Upgraded version of Flames of Devotion. It does bonus 20% Burn damage and grants a buff for 10 secs that increases damage done by 10% as Burn from attacks. It is also a Full Attack so if you are using Two Weapons it strikes with both.
Eternal Devotion – Upgraded version of Flames of Devotion. It does bonus 20% Burn damage and grants a buff for 10 secs that increases damage done by 10% as Burn from attacks. It is also a Full Attack so if you are using Two Weapons it strikes with both.
![]()
![]() Enduring Beacon – Upgraded version of Glorious Beacon. Blinds enemies around you for short period of time, making them miss more and granting you chance of triggering Riposte. Also you and allies near you get +15 Deflection while Blind lasts, making you even harder to hit.
Enduring Beacon – Upgraded version of Glorious Beacon. Blinds enemies around you for short period of time, making them miss more and granting you chance of triggering Riposte. Also you and allies near you get +15 Deflection while Blind lasts, making you even harder to hit.
![]()
![]() Deep Faith – Adds +10 to all defenses. This is a much better passive than it seems, and it would be foolish not to take it.
Deep Faith – Adds +10 to all defenses. This is a much better passive than it seems, and it would be foolish not to take it.
![]()
![]() Retribution – When suffering damage, gain a bonus of 5% additional damage that stacks up to 5 times to your next weapon attack. Useful since we are going to be fighting multiple enemies at once which means suffering damage is going to happen a lot.
Retribution – When suffering damage, gain a bonus of 5% additional damage that stacks up to 5 times to your next weapon attack. Useful since we are going to be fighting multiple enemies at once which means suffering damage is going to happen a lot.
 Exalted Endurance – This will upgrade your Armor Aura to heal in an AoE around you. Because you’ll have decent Might for this Build you’ll get some extremely good healing from this one, which is pretty much the theme for this Build.
![]()
![]() Inspired Defenses – Adds +1 to AR for 3 seconds against the same damage type you were struck with in the first place.
Inspired Defenses – Adds +1 to AR for 3 seconds against the same damage type you were struck with in the first place.
![]()
![]() Combat Focus – Adds Concentration at the start of the battle. We don’t cast too many Spells with this Build, but we don’t want to be interrupted when we do.
Combat Focus – Adds Concentration at the start of the battle. We don’t cast too many Spells with this Build, but we don’t want to be interrupted when we do.
![]()
![]() Inspired Path – Increases maximum Zeal by 1. More Zeal equals more abilities we can use while in combat. It’s a no brainer.
Inspired Path – Increases maximum Zeal by 1. More Zeal equals more abilities we can use while in combat. It’s a no brainer.
![]()
![]() Scion of Flame – Adds +1 PEN with anything that has the Keyword Fire. That means Eternal Devotion as well.
Scion of Flame – Adds +1 PEN with anything that has the Keyword Fire. That means Eternal Devotion as well.
![]()
![]() Virtuous Triumph – Grants 25% chance to restore 1 Zeal upon killing an enemy. It is a must have so that we can use Enduring Beacon and Eternal Devotion as much as possible.
Virtuous Triumph – Grants 25% chance to restore 1 Zeal upon killing an enemy. It is a must have so that we can use Enduring Beacon and Eternal Devotion as much as possible.
![]()
![]() Stoic Steel – Adds +1 Armor per 6 secs when standing still. Moving ends the effect.
Stoic Steel – Adds +1 Armor per 6 secs when standing still. Moving ends the effect.
Holy Slayer Abilities Rotation
I would recommend having a Priest in party so that they can cast Triumph of the Crusaders and Holy Meditation. Triumph adds +5 to MIG and it heals you upon killing an enemy for a significant amount. Holy Meditation grants the Resolute Inspiration, which increases Resolve +5 which increases Deflection. Now you are ready to fight. Either start picking off ranged enemies or go against many enemies at once. Both options work. Just pay attention when fighting 4-5 enemies at once. You are not immortal or tanky at all, you are simply hard to hit at times, with just enough sustainability. When fighting multiple enemies Enduring Beacon is your “oh shit” ability, to make them miss a lot.
The downside of this build is that we can only engage 1 enemy at a time (wearing Contender’s Armor increases engagement to 2). One of many upsides is that we do insane damage due to the high number of damage bonuses, especially when Bloodied (25%-50% Health). Crits can go sometimes close to 200 with a Greatsword, which means we heal for 30 per such Crit. Heals from Steel Garrote passive depend on damage severity, but it is usually from 10-30 at higher levels. Make sure that you are using Debilitating Strike as much as possible and afterwards Eternal Devotion when Guile has been depleted. We need Zeal for Enduring Beacon in most cases. Not only do we heal from Steel Garrote but from equipment as well. It would also be wise to equip Blackened Plate Armor on another party member to receive periodic heals from them too.
- Buffs Holy Meditation and/or Triumph of the Crusaders
- Debilitating Strike
- Enduring Beacon if surrounded
- Eternal Devotion when out of Guile
- Garrote is optional
Final Tips
This build is great for taking down enemies fast and keeping yourself healthy while doing so. Healers are not required to pay attention to you while you are running around killing stuff, making party management easier. This Build can be played effectively from level 1, but during earlier levels try to avoid fighting many enemies at once, until better equipment and passives have been obtained. Before that just play it as a normal DPS build, going from enemy to enemy and taking them down fast.

Skills that are useful for this build depend on equipment, due to some of it scaling with certain Skills. If none of the things that you have equipped at the moment do not scale with certain Skills then Alchemy or Athletics are the most useful ones for this build. Drugs, although nerfed, are still good enough. For example Mouth Char, Coral Snuff and Svef are all great choices.
Stay tuned for more Pillars of Eternity 2 Build Guides, as we make some more specific Guides covering some of the most fun and interesting combinations we could find. If there is a specific combination you would like to see, please post in the comments and we will do our best to accommodate!
Log in to leave a Comment